How to Use Google Drive for Backup: Google Drive has quietly turned into that one place where everything important ends up—work reports, college assignments, client folders, travel photos, invoices, and random “I’ll need this later” files. But here’s the problem: most people only use it like a simple online folder… and completely ignore its real power.
When you actually learn how to use Google Drive for backup and file sharing properly, it becomes much more than storage:
- It protects your files if your laptop dies, gets stolen, or gets infected.
- It lets you work smoothly across devices—phone, office PC, home laptop.
- It makes sharing files with clients, teammates, or friends as easy as sending a link.
At the same time, there are real risks: accidental deletion, wrong sharing permissions, or a synced ransomware-infected file can cause serious data loss if you’re not prepared. That’s why you need to treat Google Drive not just as “some cloud space,” but as part of your backup and collaboration strategy.
In this guide, we’ll walk through—step by step—how to turn Google Drive into a reliable backup tool for your files, and how to share documents and folders safely, smartly, and professionally.
Also Read: How to Clear Cache on Android Phone: Easy Step-by-Step Guide
What Is Google Drive & Why Does It Matter?
Before we jump into the how-to, let’s quickly understand what Google Drive actually offers.
Google Drive is a cloud storage service from Google where you can store:
- Documents, PDFs, spreadsheets, presentations
- Photos and videos
- ZIP/RAR files, design files, and more
You get:
- 15 GB of free storage shared across Drive, Gmail, and Google Photos (more if you buy a Google One plan)
- Access from any device (mobile, desktop, web)
- Built-in tools like Google Docs, Sheets, Slides, and Forms
But here’s the catch:
Google Drive is not a full backup solution by default. It stores your files, yes, but if something goes wrong (accidental deletion, malware, malicious insider, app attack, etc.), Google doesn’t automatically keep an independent backup copy for you.
That’s where proper backup strategy comes in.
Why You Should Back Up Your Google Drive
You might think: “But my files are already in the cloud… isn’t that a backup?”
Not exactly.
Google operates on a shared responsibility model. That means:
- Google is responsible for keeping the platform running (servers, availability, basic security).
- You are responsible for your data (backups, access control, recovery).
Common Risks to Your Google Drive Data
Your Google Drive content can be lost or compromised in several ways:
- Human error
- You (or a teammate) accidentally delete a file or folder
- Someone overwrites a document with the wrong version
- Files moved to Trash and auto-deleted after 30 days
- Malicious actions
- Disgruntled employees deleting or modifying data
- Ex-employees still having access to shared folders
- Ransomware & malware
- Infected local files sync to Google Drive
- Encrypted or corrupted files overwrite your clean versions
- Zero-day attacks / third-party app issues
- A compromised app with OAuth access modifies or deletes content
- Misconfigured integrations accidentally clear or alter data
In short: Google Drive is reliable, but your data is not bulletproof.
A solid backup strategy ensures:
- You always have a secondary copy of critical files
- Faster recovery during incidents (less downtime)
- Extra protection for business continuity and compliance
Two Main Things You’ll Use Google Drive For
When people say “I use Google Drive”, they usually mean one of these two (or both):
- Backup – keeping important files safe and accessible from anywhere
- File sharing – collaborating with others in real-time or sharing access to files/folders
We’ll cover both in detail.
Part 1: How to Use Google Drive for Backup (Desktop)
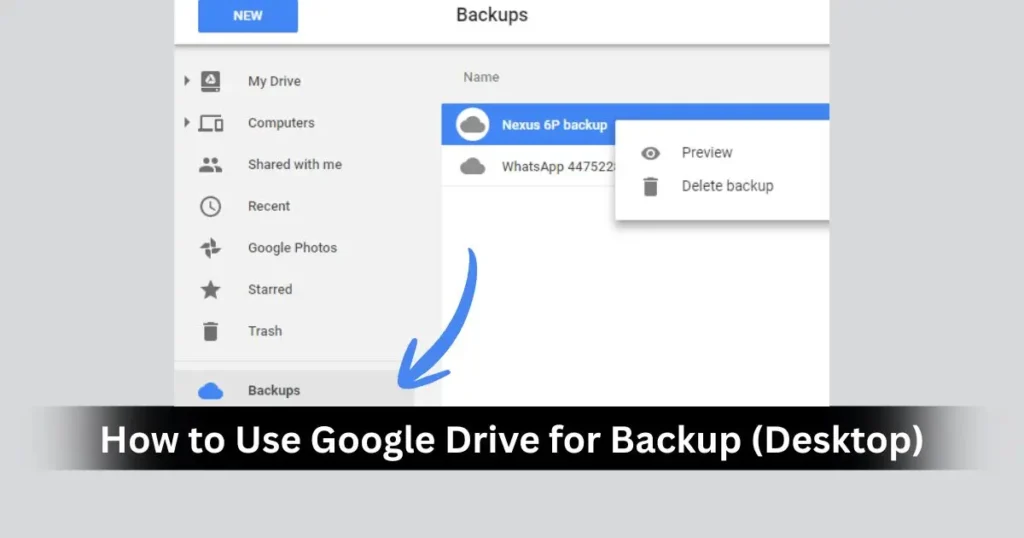
The easiest way to turn Google Drive into a backup tool is to use the Google Drive for desktop app (formerly Backup and Sync / Drive File Stream).
This app lets you:
- Sync specific folders on your computer with Google Drive
- Access Drive files directly from File Explorer (Windows) or Finder (macOS)
- Optionally back up photos/videos to Google Photos
Step 1: Install Google Drive for Desktop
- Open your browser and go to Google Drive (drive.google.com).
- Look for the Download Drive for desktop option (usually in the settings or footer).
- Download the installer for Windows or macOS.
- Run the installer and follow the on-screen steps.
- Sign in using your Google account (personal Gmail or Workspace account).
Once installed, you’ll see a Google Drive icon in your system tray (Windows) or menu bar (macOS).
Step 2: Choose Folders to Sync From Your Computer
After signing in, the app will ask which folders from your computer you want to sync and/or back up.
Common choices:
- Desktop
- Documents
- Pictures
- Any other custom folder where your important files live
You can typically select between:
- Mirror files: Keeps a copy both on your device and in the cloud
- Stream files: Files live in the cloud and are downloaded on demand
For backup purposes, many users prefer having important folders mirrored or at least ensured that key files are uploaded to Drive.
Tip:
Don’t blindly sync your entire computer. Choose only the folders that actually matter (work files, photos, project folders). This keeps storage usage under control.
Step 3: Access Your Synced Files
Once configured, your synced files are available in three places:
- On your computer
- As normal folders in File Explorer (Windows) or Finder (macOS) under “Google Drive”.
- On the web
- Go to drive.google.com
- You’ll see synced folders inside My Drive
- On mobile
- Install the Google Drive app (Android/iOS)
- Sign in and access your folders from anywhere
This is where Google Drive starts behaving like a hybrid of backup + sync:
- Edit a file on your laptop → changes sync to the cloud
- Upload a file from the web → it appears in the Drive folder on your computer
Step 4: Optional – Sync Photos and Videos to Google Photos
If you capture a lot of photos and videos, you can:
- Configure the desktop app to back up media files to Google Photos as well as Google Drive (depending on settings availability in your version).
- Or directly back up from your phone’s Google Photos app.
This helps if:
- You need all your images on the cloud, organized by album/date
- You want them available on any device without manual transfer
Just be mindful of storage usage, because high-quality photos and videos can eat up your space quickly.
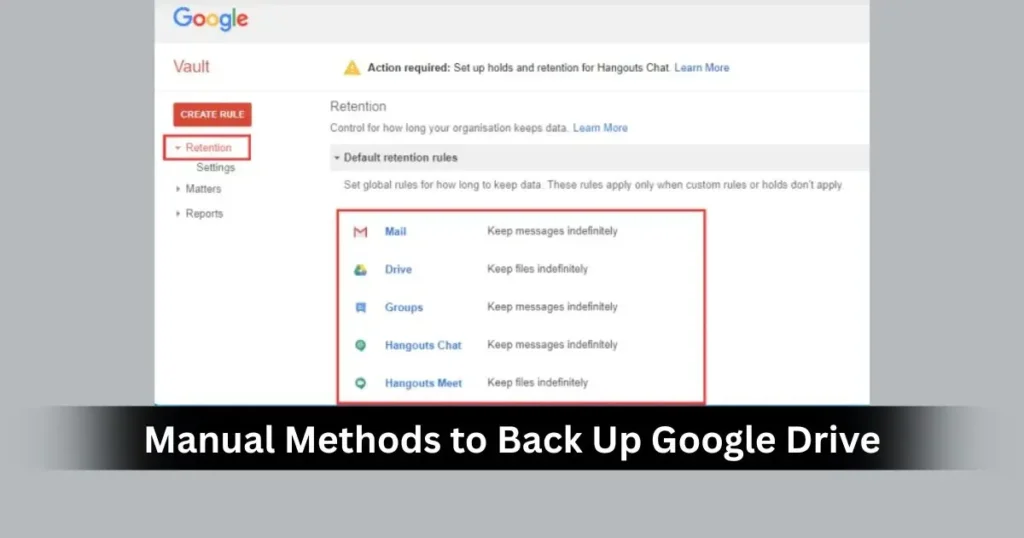
Part 2: Manual Methods to Back Up Google Drive
Now let’s flip it: instead of using Drive to back up your computer, what if you want to back up your Google Drive itself?
This is important because:
- If something goes wrong inside Google Drive (deletion, malware, app issue), you may want another copy somewhere else—like an external hard drive or another cloud service.
There are three popular manual methods:
- Download files to an external hard drive
- Use the Google Drive desktop sync client (with additional local backup)
- Use Google Takeout for one-time exports
These approaches are not fully automated, but they’re useful for individuals or small businesses with limited data.
Option 1: Back Up Google Drive to an External Hard Drive
This method is great if:
- You have a small to moderate amount of data
- You want a one-time backup (e.g., before a big cleanup)
- You prefer to store files offline (for security or compliance)
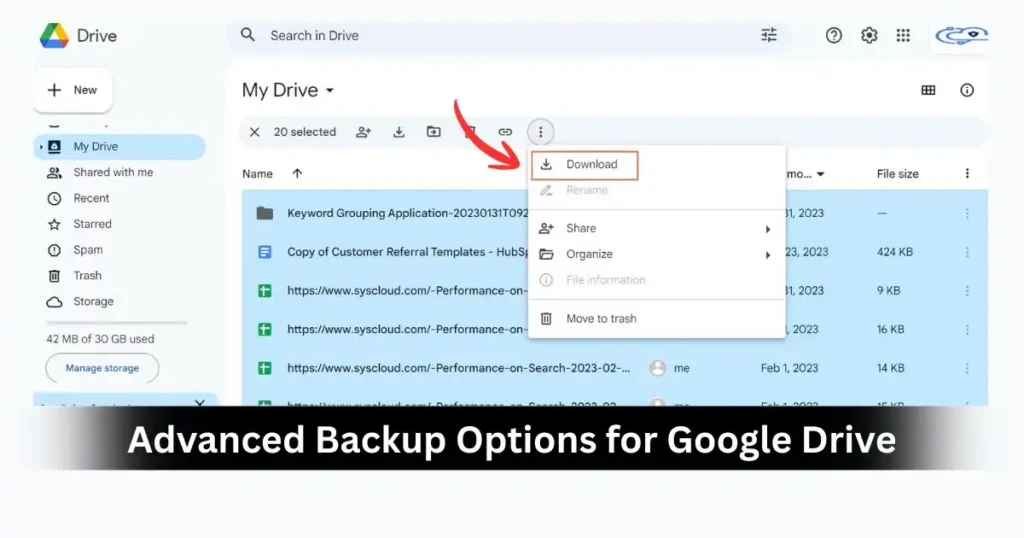
Steps:
- Go to Google Drive (drive.google.com) in your browser.
- Navigate to the folder you want to back up (or stay in “My Drive” if you want everything).
- Press Ctrl + A (Windows) or Cmd + A (Mac) to select all files, or manually choose specific files/folders.
- Right-click and select Download.
- Google will prepare a ZIP file with your selected content.
- Once downloaded, move this ZIP file to your external hard drive.
- Extract it when needed or keep it as an archive.
Pros
- Very simple and quick for small data sets
- No additional software required
- You maintain offline control of your data
Cons
- It’s manual – you must remember to repeat it regularly
- Easy to forget new or updated files
- Requires enough storage space on your external drive
- Not ideal for frequently changing data
This method works best if you:
- Store critical files in a single folder
- Don’t change them very often
- Just want a monthly or occasional snapshot of your Drive
Option 2: Use Google Drive Desktop Client + Local Backup
The Google Drive desktop app isn’t just for backing up your computer to the cloud – it can also act as part of your Google Drive backup strategy.
Here’s the idea:
- The desktop app syncs your Drive data down to your computer.
- Then, you use a separate backup method (like backing up your whole laptop to an external hard disk) to protect that local copy as well.
This gives you double protection:
- Cloud copy in Google Drive
- Local copy on your computer
- Extra local backup on an external drive (if you configure one)
How It Works
- Install the Google Drive for desktop app (if not already).
- Sign in and set it to sync your Google Drive files to a local folder.
- Now use your regular system backup (Windows backup, Time Machine, or third-party backup tool) to back up that local folder to an external drive or NAS.
Pros
- Automatic: once configured, sync happens in the background
- Files available both online and offline
- Great for people who regularly work with Drive files
Cons
- Uses local hard drive space
- Sync means: if a file is deleted from Google Drive, it may also be deleted locally
- You still need a separate backup of your local copy (otherwise it’s just sync, not backup)
Important Note:
Sync is not the same as backup. If a ransomware attack encrypts files on your computer, the encrypted versions may sync to Google Drive, replacing the clean ones. That’s why having an offline or versioned backup is critical.
Option 3: Use Google Takeout for One-Time Archive
Google Takeout is Google’s official tool for exporting your account data.
It can export:
- Google Drive files
- Gmail messages
- Google Photos
- Contacts
- Calendar data, and more
If your goal is to take a complete snapshot of your Drive, this is a powerful option.
Steps to Back Up Drive with Google Takeout
- Go to Google Takeout (you can search “Google Takeout” in Google).
- Log in with the Google account whose data you want to export.
- You’ll see a list of Google services (Drive, Gmail, Photos, etc.).
- By default, everything is selected.
- Click Deselect all if you only want Drive.
- Then scroll and tick Drive.
- Optionally, customize:
- Which folders in Drive to include
- File formats (e.g., convert Docs to Word, Sheets to Excel, etc.)
- Click Next step.
- Choose:
- Delivery method (download link via email, add to Drive, Dropbox, OneDrive, Box, etc.)
- Export frequency (one-time, or scheduled for a limited period if available)
- File type & size (e.g., .zip, 2 GB chunks)
- Click Create export.
- Google will prepare your archive and email you a link when ready.
Pros
- Can export all Google services, not just Drive
- Can send data directly to other cloud platforms
- Good for mass migration, legal/archival purposes, or account closure
Cons
- Primarily designed for one-time exports
- No full real-time, automated backup across months/years
- If you forget to run exports regularly, you risk losing recently changed files
This method is perfect when:
- You’re leaving a company or school Google account
- You want a local copy of everything for safety
- You’re migrating to another service
Part 3: How to Use Google Drive for File Sharing
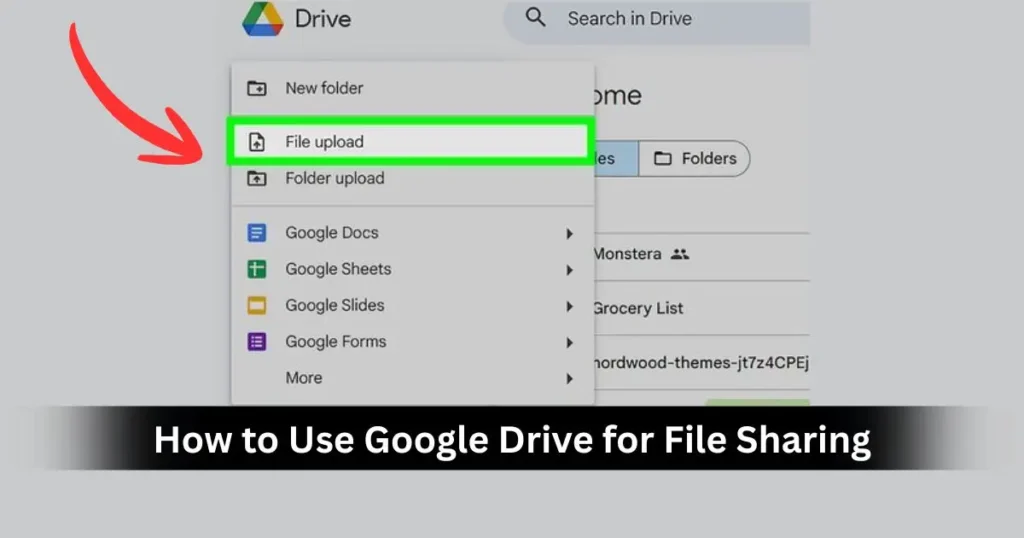
Backup is only half the story. One of Google Drive’s biggest strengths is easy file and folder sharing.
You can:
- Share with specific people (by email)
- Share entire folders with teams
- Create shareable links with custom permissions
Let’s go step-by-step.
Sharing Files and Folders with People
This is ideal when you know exactly who should have access (e.g., teammates, clients, classmates).
Steps to Share a File/Folder
- Open Google Drive (web or desktop).
- Right-click the file or folder you want to share.
- Select Share.
- In the pop-up window, enter the email addresses of the people you want to share with.
- Next to each person, choose their permission level:
- Viewer – can only view
- Commenter – can view + add comments (documents, sheets, etc.)
- Editor – can view, comment, and make changes
- Optionally, add a message explaining what the file is about.
- Click Send.
The person will receive an email with a link and access based on the permission you selected.
Sharing a Folder
Sharing a folder works the same way, with a key difference:
- Everyone you share the folder with automatically gains access to all files and subfolders inside it (subject to some advanced folder/file permission rules).
This is ideal for:
- Project folders (all project documents in one place)
- Team drives for departments or clients
- Class folders for assignments and material
Tip:
Avoid giving Editor access to large shared folders unless needed. Over-privileged access is a common cause of accidental deletions and messy structure.
Sharing via Link (Link Sharing)
Link sharing is useful when:
- You don’t want to manage individual email addresses
- You’re sharing with many people (e.g., a class, community, or client list)
- You’re embedding a file link in a website or document
Steps to Share a Link
- Right-click the file or folder in Google Drive.
- Click Get link (or open Share and look for link settings).
- You’ll see a section such as:
- Restricted – only people added can open
- Anyone with the link – anyone who has the link can access
- Choose the appropriate access level and permission:
- Viewer – people can only read/download
- Commenter – can comment (for Docs, Sheets, etc.)
- Editor – can edit/delete, so use with caution
- Copy the link and send it via email, chat, or wherever you need.
Security Tip:
Be careful with “Anyone with the link – Editor”. That’s basically giving full power to anyone who accidentally gets the link. For public sharing (blogs, documentation), use Viewer mode.
Recommended Permission Strategy
To keep things safe and organized:
- Use Viewer for:
- Reports, invoices, final designs, read-only documents
- Use Commenter for:
- Documents under review, feedback cycles, drafts
- Use Editor for:
- Direct collaborators, core team members, co-authors
And always review:
- Who currently has access (check the Share dialog periodically).
- Whether ex-employees or ex-clients still have access to old folders.
Part 4: Advanced Backup Options for Google Drive
Manual methods are fine for individuals, freelancers, or very small teams. But what if:
- You generate a lot of data every day
- You handle sensitive business information
- You need compliance, audit trails, or guaranteed recovery
Then you’ll want more automated and professional backup tools.
Here are some categories of options:
1. Manual Backup (Recap)
We’ve already covered:
- Direct download to external hard drive
- Sync client + local backup
- Google Takeout
These are:
- Low-cost or free
- Partially manual
- Good for basic use cases
But they don’t offer full automation, versioning for all files, or ransomware-resistant snapshots.
2. Automated Cloud Backup Tools
There are third-party services that specialize in backing up Google Workspace/Drive. Typical features:
- Automatic daily or near real-time backups
- Unlimited file version history
- Easy point-in-time restore
- Backup for Drive, Shared Drives, Gmail, Calendar, Contacts, etc.
Some common tools fall into categories like:
- Google Vault™ – more for archiving, eDiscovery, and retention policies than true backup (focuses heavily on compliance and legal hold).
- Third-party backup solutions (like SpinBackup and others) – full backup targeted at Google Workspace environments.
What they usually offer:
- Centralized backup for the entire organization
- Protection against accidental deletions, insider threats, ransomware
- Ability to quickly restore individual files or entire accounts
- Admin dashboards for IT teams
These solutions are especially suitable for:
- Small and medium businesses
- Enterprises using Google Workspace
- Agencies handling client data
Backup vs Archive vs Sync – Don’t Confuse Them
To make the right choice, understand the difference:
- Sync: Keeps the same set of files in two or more locations (e.g., Drive + local). If you delete or change something in one, it changes everywhere.
- Archive: Keeps old data for long-term storage or legal reasons, typically not actively used in daily work.
- Backup: Keeps independent, restorable copies of your data, often versioned over time so you can roll back to a specific point.
For true safety, you want backup, not just sync.
Best Practices: How to Use Google Drive Safely & Effectively
Let’s wrap the concepts into some practical tips.
1. Design a Simple Backup Routine
Even if you don’t use paid tools, you can set up a simple habit:
- Use Drive for desktop to keep working files synced.
- Once a week or month, download a ZIP (or use Takeout) of crucial folders.
- Copy that ZIP to an external hard drive or another cloud (like Dropbox/OneDrive).
This way, you have:
- Live working copies in Google Drive
- Extra offline/secondary copies as emergency backups
2. Use Strong Access Controls
- Don’t overshare with “Anyone with the link – Editor”.
- Regularly audit who can access sensitive folders.
- Remove access for old collaborators and ex-employees.
- Use Viewer or Commenter by default, upgrade to Editor only when needed.
3. Protect Yourself from Ransomware & Malware
- Avoid installing shady third-party apps that ask for Drive permissions.
- Keep your devices updated with security patches.
- Use reputable antivirus solutions on your laptops/desktops.
- Consider backup tools that offer ransomware protection and recovery.
4. Use Version History
Google Docs, Sheets, and Slides have built-in version history:
- Open a file
- Go to File → Version history → See version history
From there, you can:
- See who changed what and when
- Restore earlier versions
This isn’t a complete backup solution, but it’s super useful for day-to-day recovery of recently edited documents.
FAQs: How to Use Google Drive for Backup
1. Is Google Drive itself a backup solution?
Google Drive offers reliable cloud storage and syncing, but it is not a complete backup solution. If files are deleted, overwritten, or corrupted, that change can propagate everywhere. That’s why it’s wise to maintain additional backups (external drive, another cloud, or dedicated backup tools).
2. What’s the easiest way to back up files to Google Drive from my PC?
The easiest method is to use the Google Drive for desktop app:
Install it on your Windows or Mac computer
Choose folders (e.g., Documents, Desktop, Pictures)
Let it automatically sync files to your Google Drive in the background
You can then access them from any device.
3. How can I back up my whole Google Drive to another location?
You have a few options:
Download everything as a ZIP from drive.google.com and copy to an external drive
Use Google Takeout to export your Drive data and send it to your computer or another cloud
Use a third-party backup service to automatically back up your Drive to another cloud environment
The right choice depends on how much data you have and how often it changes.
4. What permission level should I use when sharing a file in Google Drive?
Use:
Viewer – when people just need to read or download
Commenter – when people should review and give feedback
Editor – when people need to actively collaborate and modify the content
For security, start with Viewer and only upgrade to Editor if absolutely necessary.
Disclaimer: This article is for information and educational purposes only. Google’s products, features, and interfaces may change over time. Always refer to the latest official Google documentation and terms of service for accurate, up-to-date details about Google Drive, Google Workspace, and related backup or sharing features.
Also Read: How to Speed Up Windows 11 (2025) – 7 Easy Fixes

Raj Prajapati is a skilled content writer dedicated to creating clear, step-by-step guides on technology, Health, and everyday solutions. With a focus on user-friendly and SEO-optimized content, he simplifies complex topics, helping readers learn and solve problems effortlessly.